Creating a Custom Connector - Part II
Photo by Daria Shevtsova from Pexels
In part I of this post, I demonstrated how to create a custom connector. Now, we’ll follow up with a short post on how to use that custom connector in a flow.
Creating Our Flow
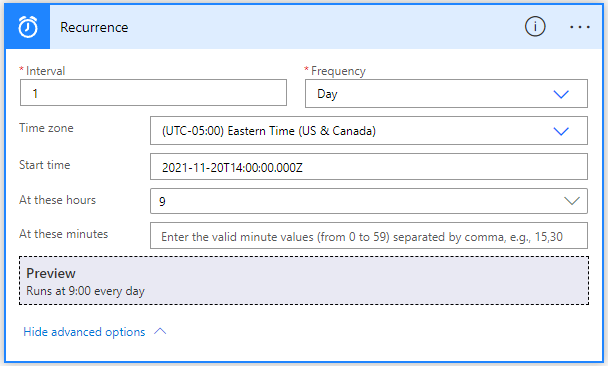
We’ll start by creating a scheduled flow. We’ll run our flow at 9AM Eastern every day.

custom-connector-ii-recurrence
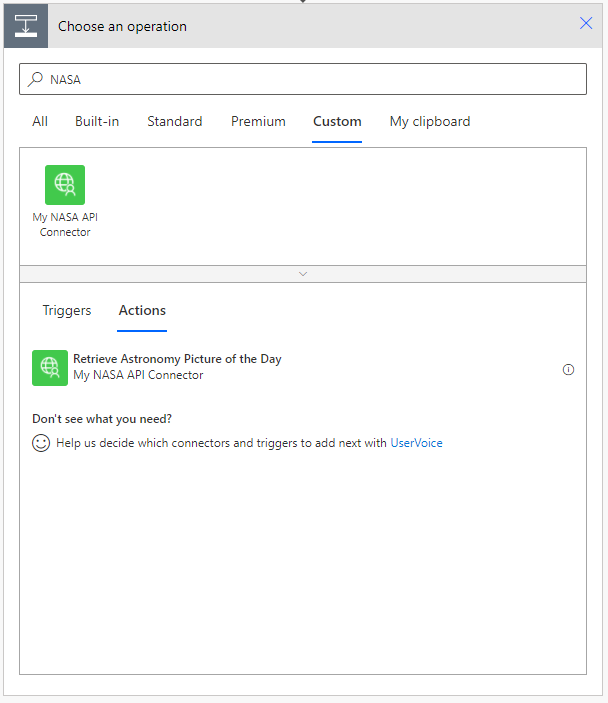
Now we’ll need to create an action based on our custom connector. There are a couple ways you can do so. You can search for the connector like you would any connector. But also, at the top of the action box, just below the search box is a row of tabs that categorize actions by general categories. One of those is labeled “Custom”. If you click there, you will see any custom connectors you have created. For our flow we’ll select our “My NASA API Connector” connector, and the “Retrieve Astronomy Picture of the Day” as our action.

custom-connector-ii-action
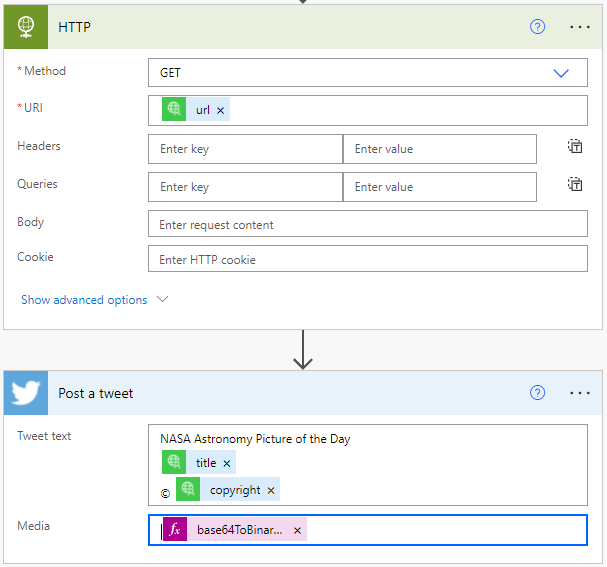
In our circumstance, the action doesn’t require any parameters. So we have only one final action. Post our tweet. There’s a couple of steps required to do this. First, you’ll need to retrieve the binary of the image. We’ll do so by using an HTTP action. It’s a GET call and the URI we pass in is the url from our NASA connector. The second action is our Twitter call to post a tweet. We’ll add the title and the copyright info to the tweet text. And into the Media parameter, we’ll pass in our image data. The image data must be in binary format, so we’ll use the handy function base64ToBinary to convert that image data to the correct format. The function will look something like this:
base64ToBinary(body('HTTP')['$content'])
This code will pull the image data out of the HTTP response, and then convert it to the binary format that the Twitter API requires to post the image. Our final two steps of the flow should look a little something like this.

custom-connector-ii-tweet
And that’s it. We’ve taken our custom connector and turned it into a daily tweet to share a little bit of awesome with a screwed up Twitter-sphere.

