Did You Know? Automating a Daily Factoid
(NOTE: Posting to Twitter no longer works. Check my YouTube channel for videos on posting to Bluesky and Mastadon)
Final post for the year. Returning once more to Power Automate. This time we’re automating the posting of a random factoid from a spreadsheet to social media. This is similar to the other post I made that posts a random blog post from the archives.
Creating Our Trigger
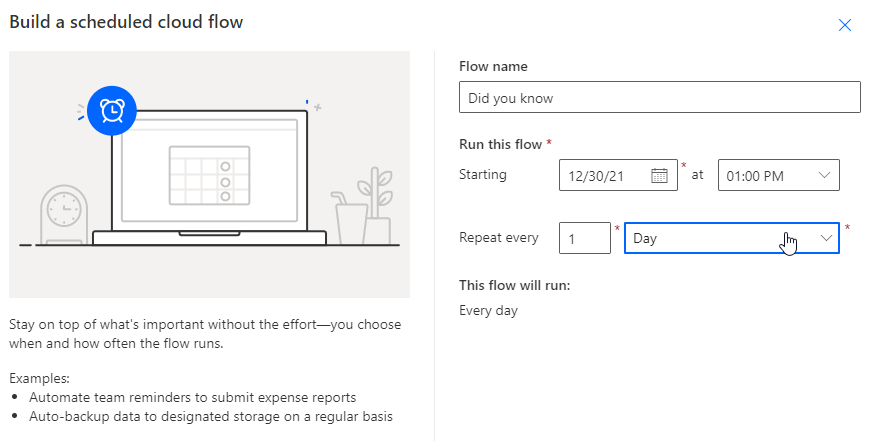
We’ll start by creating a scheduled flow. How often you post will depend on how many items you have to select from. You want to avoid posting the same thing frequently, at least in my opinion anyway. For this one, I am posting a quick note about the various connectors available in Power Automate. Currently, there are more than 500 connectors available, so I’m going to post every other day. That’s enough content to go out over two years of regular social media posting. Longer, really, since we’re doing a random selection and there’s likely to be repetition along the way.
did-you-know-create-scheduled-flow
Setting Up Source Data
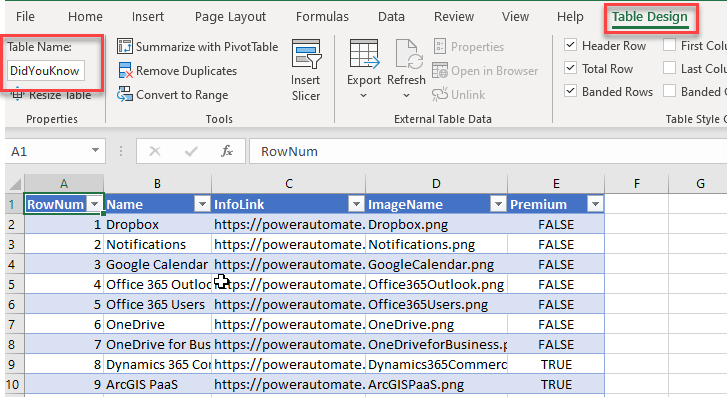
We’re going to use an Excel spreadsheet for our source data. One of the quirks of working with data in Excel spreadsheets in Power Automate is that if we want to grab rows at random, the data will need to be in a table in the spreadsheet. There’s other ways of approaching it, but for our purpose, this will be the easiest to set up.
Our table has 5 columns: a row number, a name, a link to the Microsoft Power Automate site for the connector, the name of the icon image to use, and whether or not it’s a premium connector. The table also needs to have a name that will be referenced by the Excel connector. In this case I called it “DidYouKnow”. Simple. We’ll store the file in our personal OneDrive for easy access.
did-you-know-excel-table
Since I’m including the connector icon images that appear on the Power Automate website, I did download them and put them in my OneDrive folder to make the flow a bit easier to implement.
In our flow, we’ll add a “List rows present in a table” action from the Excel Online connector.

did-you-know-excel-action
Pull a Random Row
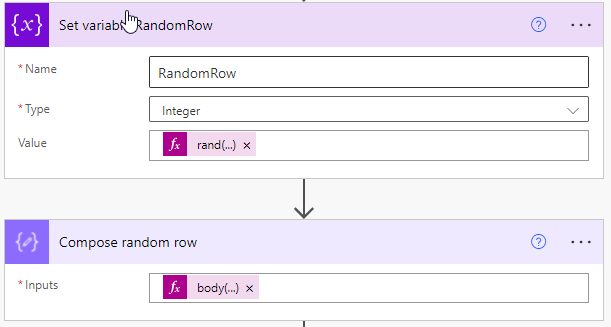
There’s a couple of steps to pulling a random row. First, we’re going to pick a random number based on the number of rows in table. For that, a “Initialize Variable” action will suffice quite well. We’ll create an integer variable and give it a name. For the initial value, we’ll use an expression with a rand function based on the table value.
rand(0,int(length(body('ListRows')?['value'])))
This expression gets the length of the ListRows body, which contains all our table rows, then picks a random number between 0 and the max length.
An interesting side note here. It used to be a requirement that all Initialize variable actions had to be at the very top of the flow, immediately following the Trigger. This is no longer the case. Hooray!!!
The second step is to grab the row itself from the Excel table. We’ll use a Compose action to handle that one, using the following expression:
body('ListRows')?['value']?[variables('RandomRow')]
This takes our random number and grabs that row from the Excel spreadsheet. These really could be combined into just the Compose with an expression like:
body('ListRows')?['value']?[rand(0,int(length(body('ListRows')?['value'])))]
but I wanted to point out that fun fact about the Initialize variable actions. :)
did-you-know-grab-a-random-row
Parse the Data and Create Our Outputs
Next step is to add a “Parse JSON” action in order to identify the data more easily for our outputs. The content of the parse action will be the output from the previous Compose action. Our schema will be pretty simple:
{
    "type": "object",
    "properties": {
        "@@odata.etag": {
            "type": "string"
        },
        "ItemInternalId": {
            "type": "string"
        },
        "RowNum": {
            "type": "string"
        },
        "Name": {
            "type": "string"
        },
        "InfoLink": {
            "type": "string"
        },
        "ImageName": {
            "type": "string"
        },
        "Premium": {
            "type": "string"
        }
    }
}
This will give us predefined outputs we can use in future steps.
Our next step will be another Compose action to give us the text for our social media posts. This will be the text part of our social media post. The one thing that’s kind of “fancy” in this Compose action is that I wanted to add an optional hashtag for when the connector is a premium tier connector. For this, I used a little if & equals function in an expression, like so:
if(equals(body('Parse_JSON')?['Premium'],'TRUE'), '#Premium', '')

did-you-know-text-compose
Get the Icon Image and Post the Message
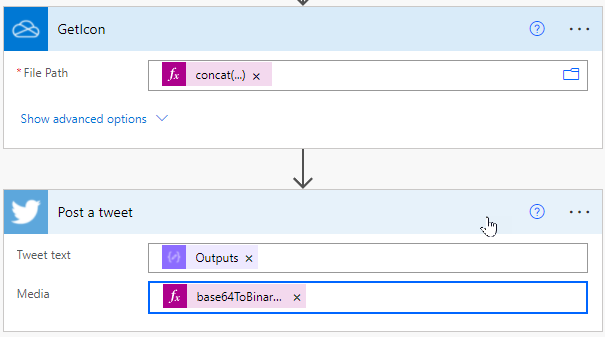
The next thing we need to do is retrieve the data for our icon image from OneDrive. For that we’re going to use the “Get file content using path” action from the OneDrive Personal connector. The thing that is a little tricky here is that the UI for this action wants you to use the selector interface to find the file. However, since the filename is dynamically retrieved, you can’t do it that way. Instead, we’re going to add an expression to tell it where to get the file. Unfortunately, until you click inside the File Path box, the “Add dynamic content” button doesn’t appear. But once it does, you can then open the expression dialog to add something similar to the following:
concat('/Projects/DidYouKnow/', body('Parse_JSON')?['ImageName'])
In this case, my icons are in a folder in OneDrive named DidYouKnow, under the Projects folder. To that we’ll concatenate the icon ImageName from our Excel row retrieved above. Now that we have our icon image data, it’s time to post to social media.
In this case, we’ll just post a tweet to Twitter. I’ve posted multiple times previously how to do so, so I’ll just put the highlights here. In our Tweet text box, we’ll add the output from the Compose above. And into the Media box, we’ll add our icon image data. Remember, the file data action returns base64 data and the Twitter action requires binary data, so we need to use our base64ToBinary function here.
base64ToBinary(body('GetIcon')['$content'])
And that’s it. We now have an automated factoid posting flow that will add some ongoing activity to our social media presence.
did-you-know-post-tweet
Download the full flow here:
