Easily Create New Bulk Work Items From a Spreadsheet
There are a lot of ways to keep track of work items: Azure DevOps, Trello, Jira, and so on. One thing they all have in common is that it can be tedious to create a bunch of work items at once. It can be a lot easier to just create a huge list of work items in a spreadsheet, especially at the beginning of a project when you’re brainstorming all the various requirements and features to be included.
Power Automate can make the task of converting that list into work items easier. For this blog post, we’ll take a spreadsheet with a basic list of work items and use it to create work items/cards in Trello, Jira, and Azure DevOps. But the basic concept can be applied to any work tracking app that has integration into Power Automate.
Source Data
We’ll start with our data source. For our purposes, we’ll create a simple Excel spreadsheet with 3 columns: a Title, a Description, and a Due Date. Of the three apps I’m demoing today, only Jira supports the Due Date in the create task action at present.
For our Excel spreadsheet, we’ll use the Excel Online connector, but you can use any spreadsheet or list source that Power Automate supports. For Excel, it requires that you place the data into a defined data table in the spreadsheet.
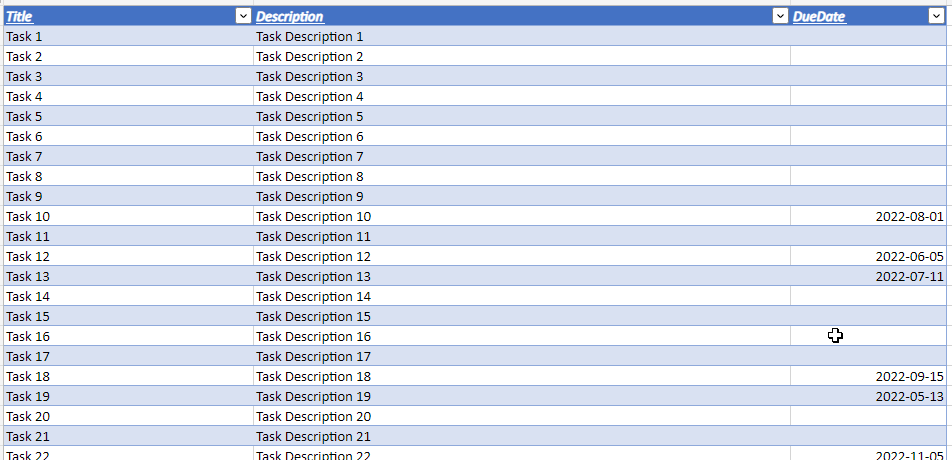
Source data table
That’s all we’ll include for now. Trello and DevOps support other information on their “create” work items actions, but there isn’t a lot of overlap between the two so we’re going to keep our source data simple for now. You can expand it more when you define which task tracking platform you’re going to use.
For our trigger, we’ll just use a manual Power Automate button trigger as we want to run this flow on demand and not based on any event or schedule.
After our manual trigger, we’ll add an Excel “List rows present in a table” action. This action will require you to select the file in your OneDrive (either personal or business) and the data table in that spreadsheet that you want to load data from.
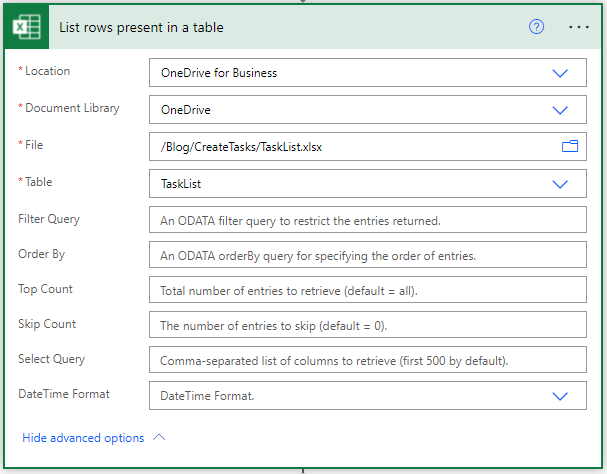
List rows in Excel spreadsheet table
Creating Our Task Items
Now that we have our data, it’s time to create our tasks. I’ll walk through Trello, Jira, and Azure DevOps in turn, detailing how to implement each of their “create work item” actions. But first, we need to add a couple of actions for maintenance and error prevention.
The first thing we’ll add is an “Apply to each” action to loop through the items in the Excel data table. After we add that loop, we’ll add a condition action to check for blank fields in our table data. While DevOps and Trello will just create work items with blank data in those fields, Jira doesn’t handle empty required fields as gracefully. The condition will check to make sure both the title and description have data in them before proceeding to generate a user story from that row of data.
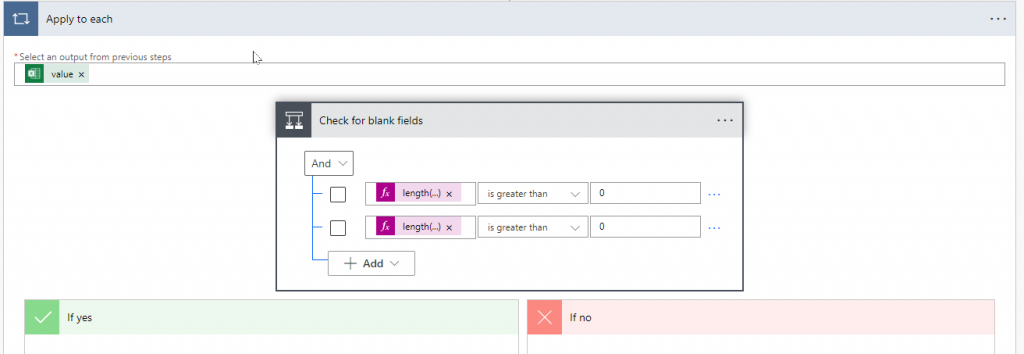
Looping through the Excel rows
Trello
The first platform we’ll look at is Trello. To use Trello, all you need is a project board and at least one list on that board. Once you have that, the only required field is a title for your card. Everything else is optional.
There are a number of fields among the optional items, including the ability to add users and labels from those that you have defined for your Trello board. But there is one field here that I want to point out that neither of the other two applications supports (at least not in the “create work item” actions): Due Date.
If you want to make use of date fields from your Excel data table, there’s one thing you’ll need to keep in mind. Excel provides dates as a number. If you take the value as-is from your Excel, it will not provide you with the correct date in your Trello board. Excel gives you a number like 44256 and Trello turns that into the default date: Dec 31, 1969.
Instead, you’ll need to use an expression in your flow to convert the Excel number to a date that Trello can understand. Your expression will look something like the following:
if(empty(items('Apply_to_each')?['DueDate']),null,addDays('1899-12-30',int(items('Apply_to_each')?['DueDate']),'yyyy-MM-dd'))
This will take the number Excel provides and turn it into a date in a format Trello can understand.
The Trello connector in Power Automate provides a “Create a card” action that can be used to create your card. Add one of those cards, select the Board Id and Parent List Id, and Card Name. From there, you can add any optional fields that you wish to. For this demo, I have also added the Description and Due Date as described above.
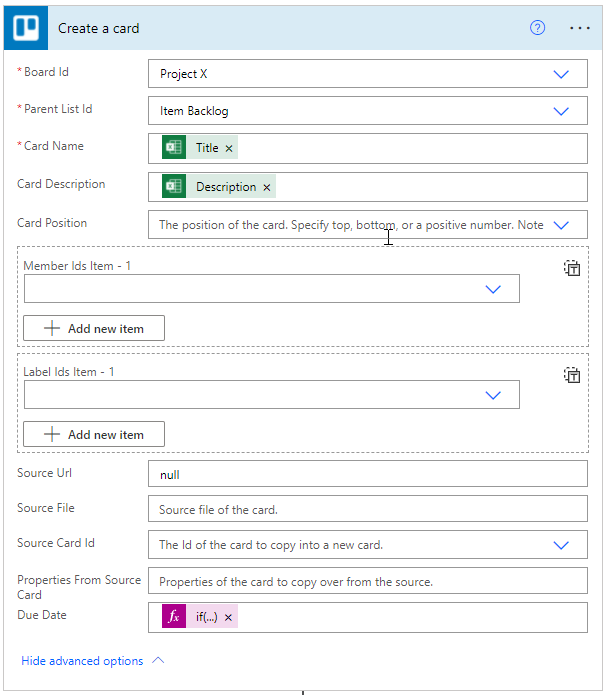
Trello Create a card action
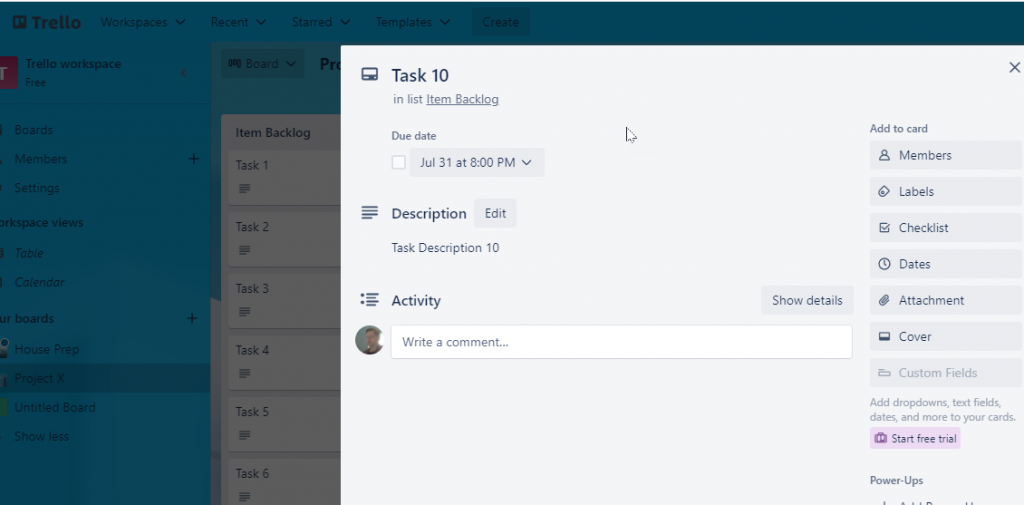
Trello Card and List
Jira
We’ll look at Jira next. Of the three, Jira provides the fewest options when creating a backlog item. All you can provide is the Summary (title) and Description. There are no other fields available for the initial Jira “Create a new issue (V2)” action. That said, you can update a number of fields on a Jira issue, as well as things like adding comments, using other JIRA Power Automate actions. But on the initial create, only Title and Description are supported. About the only option here is whether to add the item as a story, a bug, or an epic.
There are also a couple of things you will need to do in order to use Jira. The first is that you need to create an API Key. You can do this on your JIRA account screen. JIRA’s API does not support using a username and password to connect. The second thing is that the JIRA connector only supports a couple of simple data types like string, date, and number. The default JIRA schema has “Reporter” set as a required field and this field is of type “user”. You must set this field as optional in the schema or Power Automate will report 502 Bad Gateway errors any time you try to connect to JIRA.
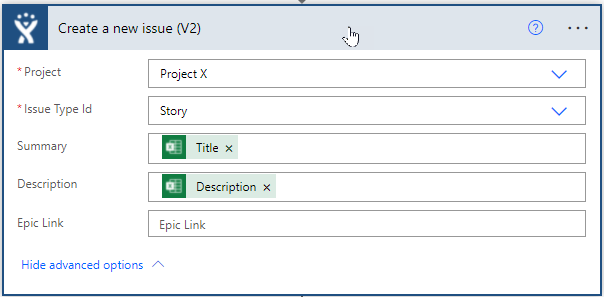
JIRA
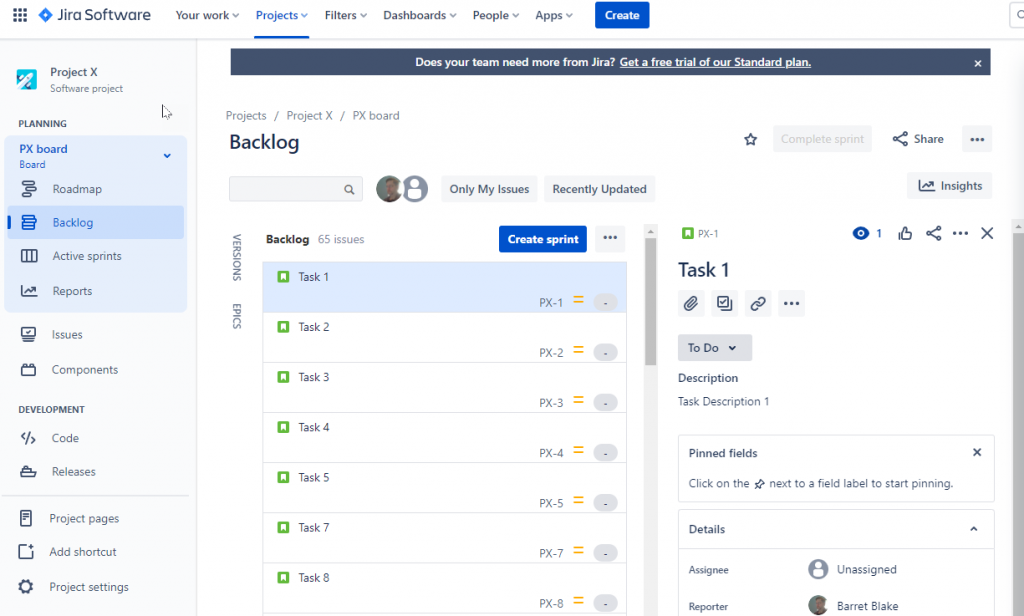
JIRA Backlog
Azure DevOps
Azure DevOps is the last platform we’ll look at here. You get a few more optional fields here to work with, but not a lot. Setup is as easy as Trello and like Trello, the only required field is the Title. Unlike Trello, there is no built-in option for Due Date. However, the Azure DevOps “Create a work item” action does have an option called “Other Fields” which lets you add any other fields you desire as key/value pairs and you can add the Due Date here. It just requires a little more setup than what is provided out of the box. DevOps is the only one of the three that gives you that free-form option in the “Create” action to let you populate just about any supported field in the platform, including dates, story points, and so forth.
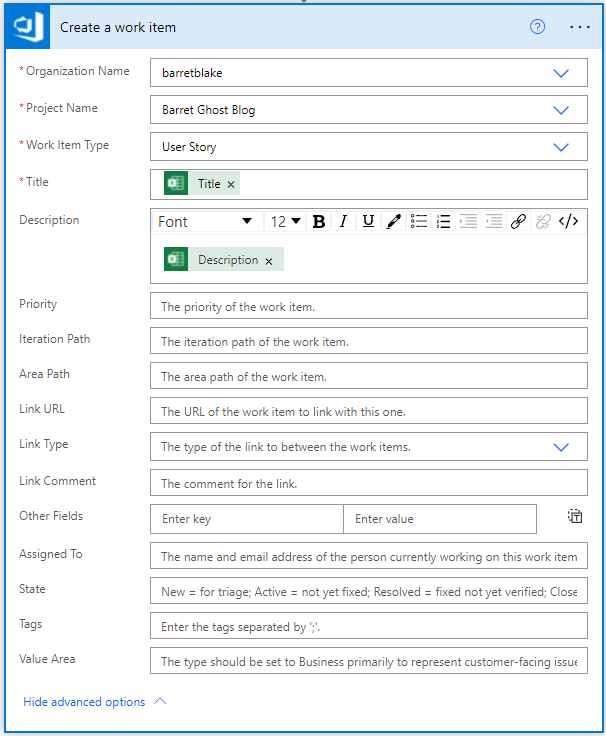
Azure DevOps
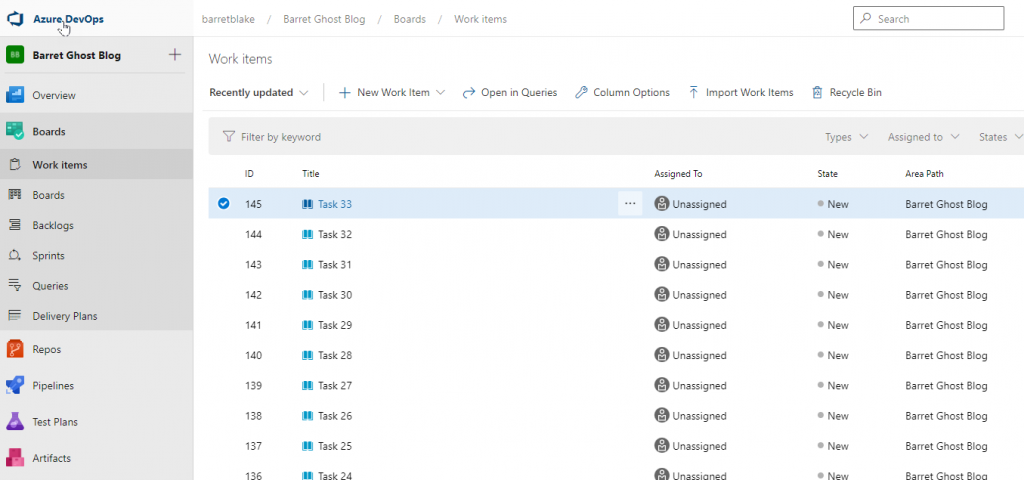
Azure DevOps Work Items
Conclusion
While this is more effort than is worth it to set up a couple of tickets, if you’re at the start of a project or plotting out a big list of new work items, this can be a huge time saver.

